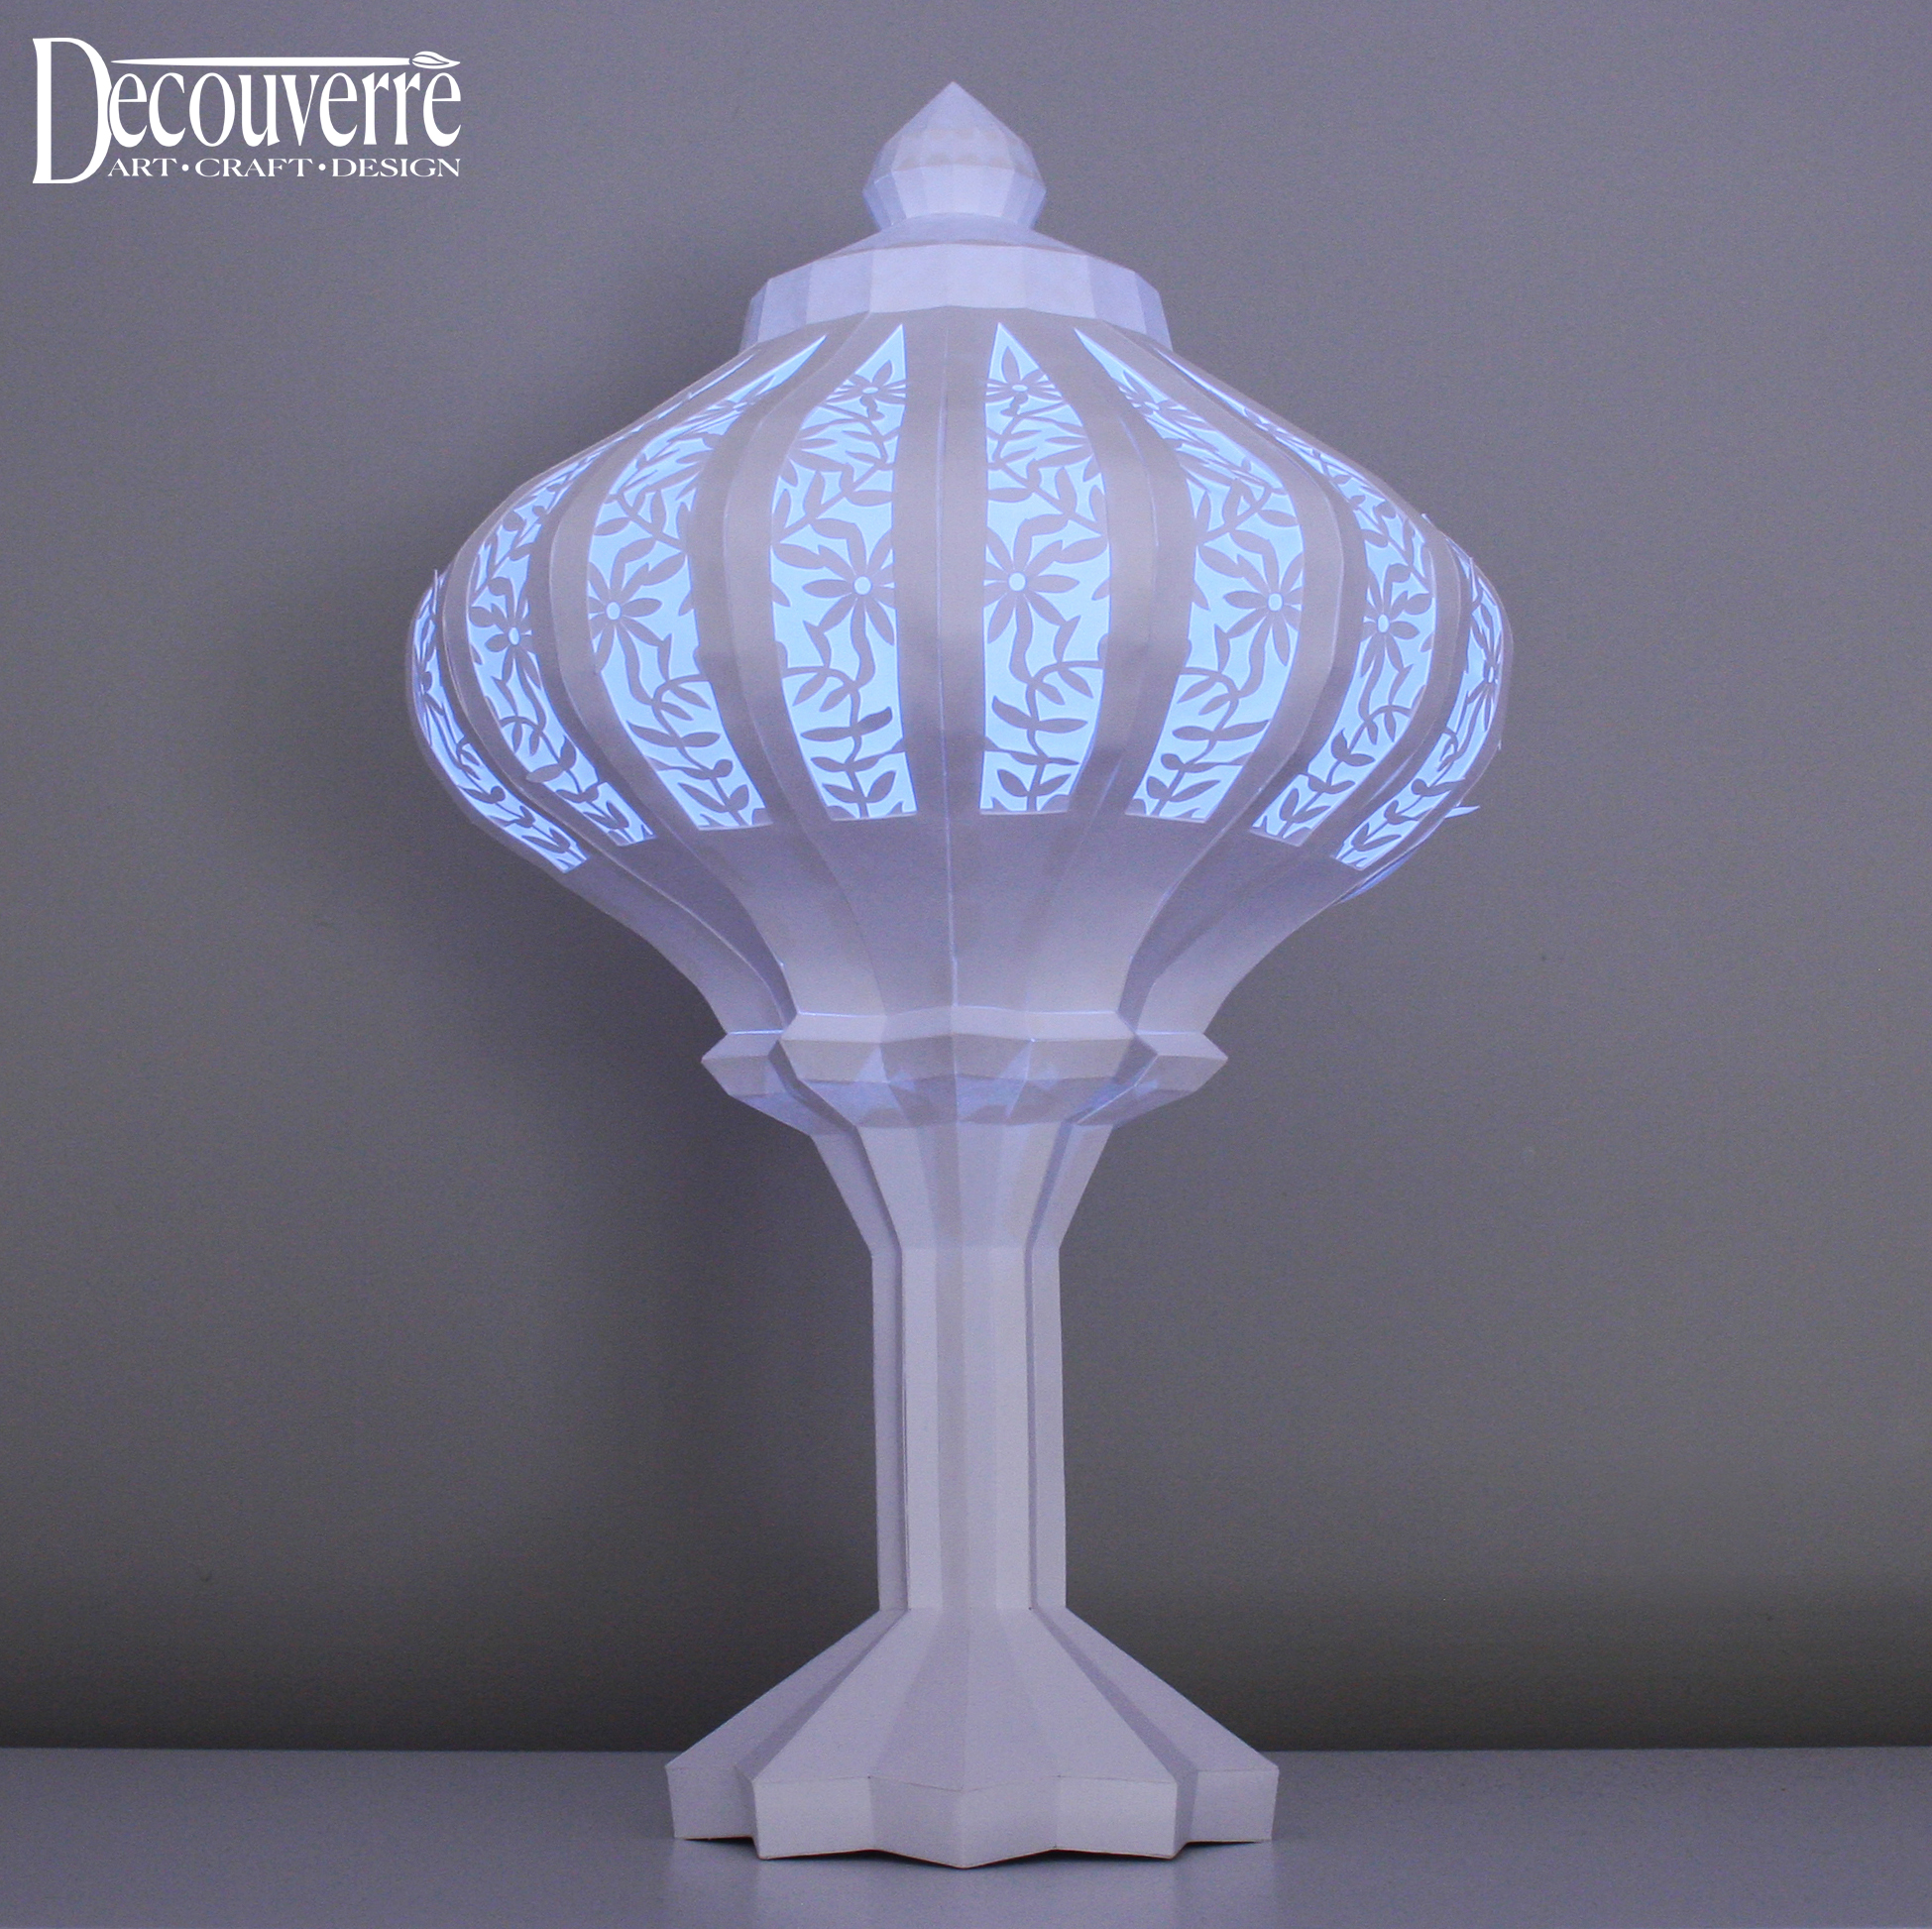
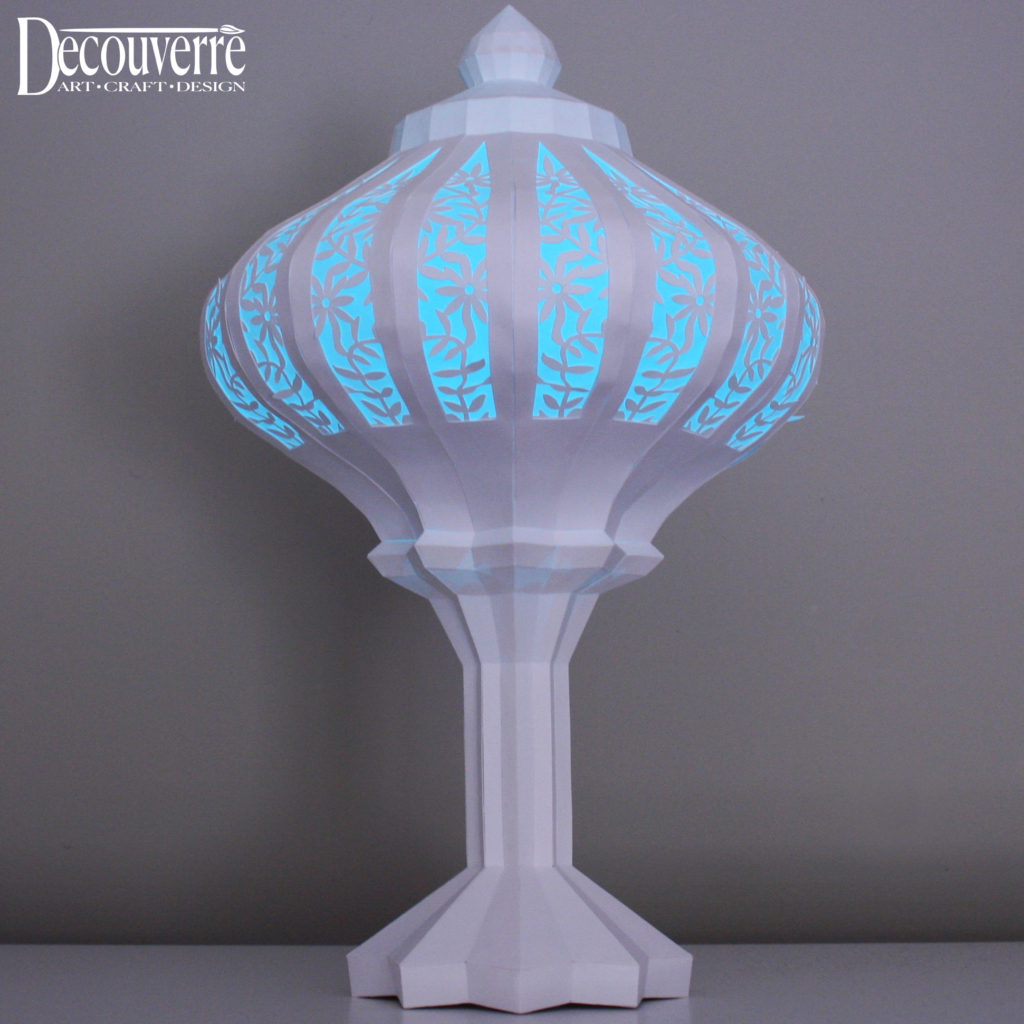
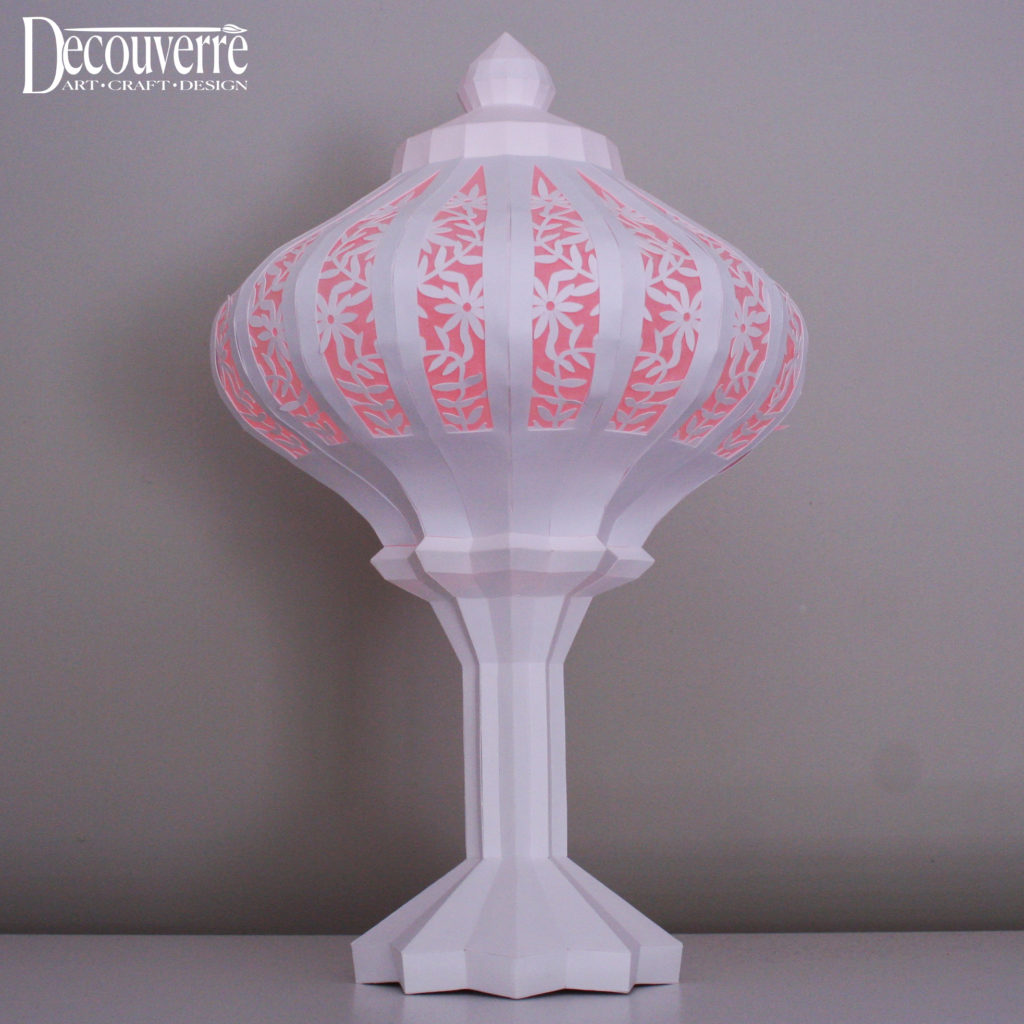
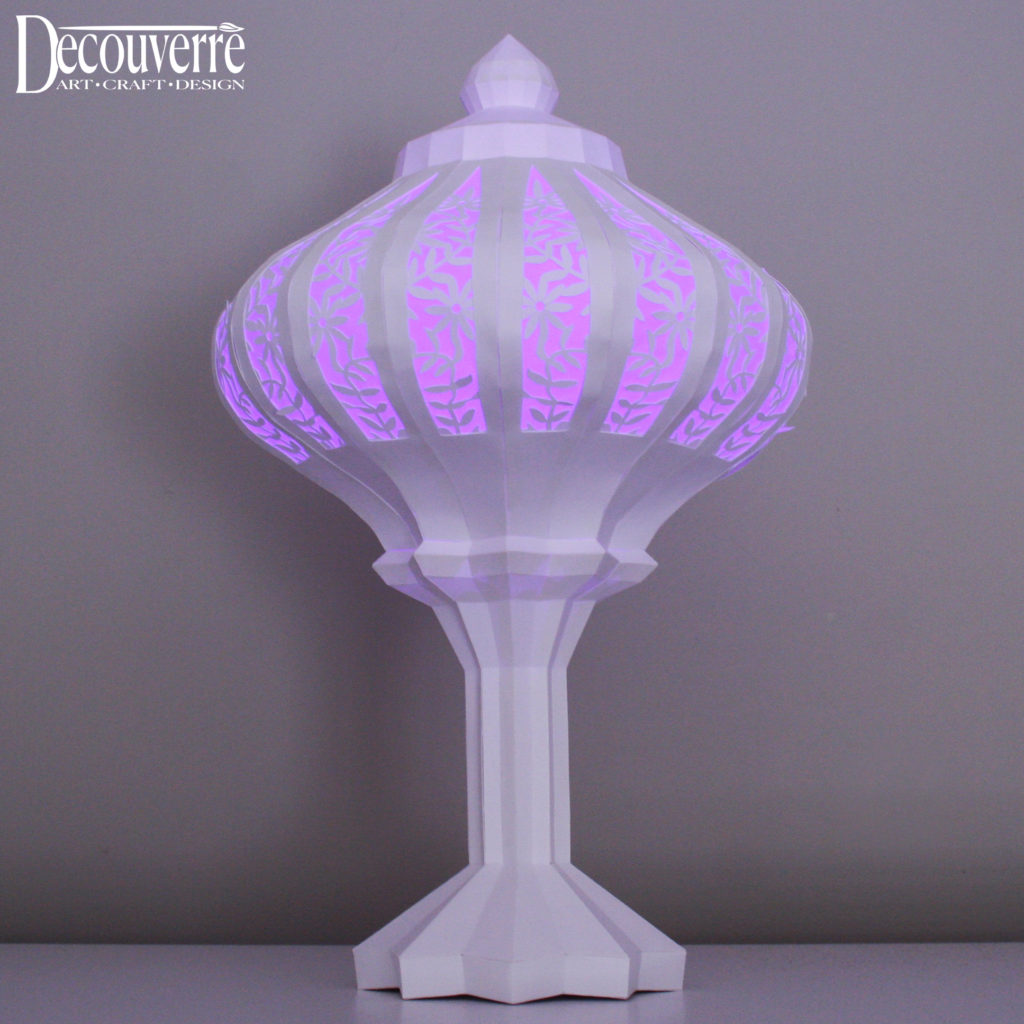
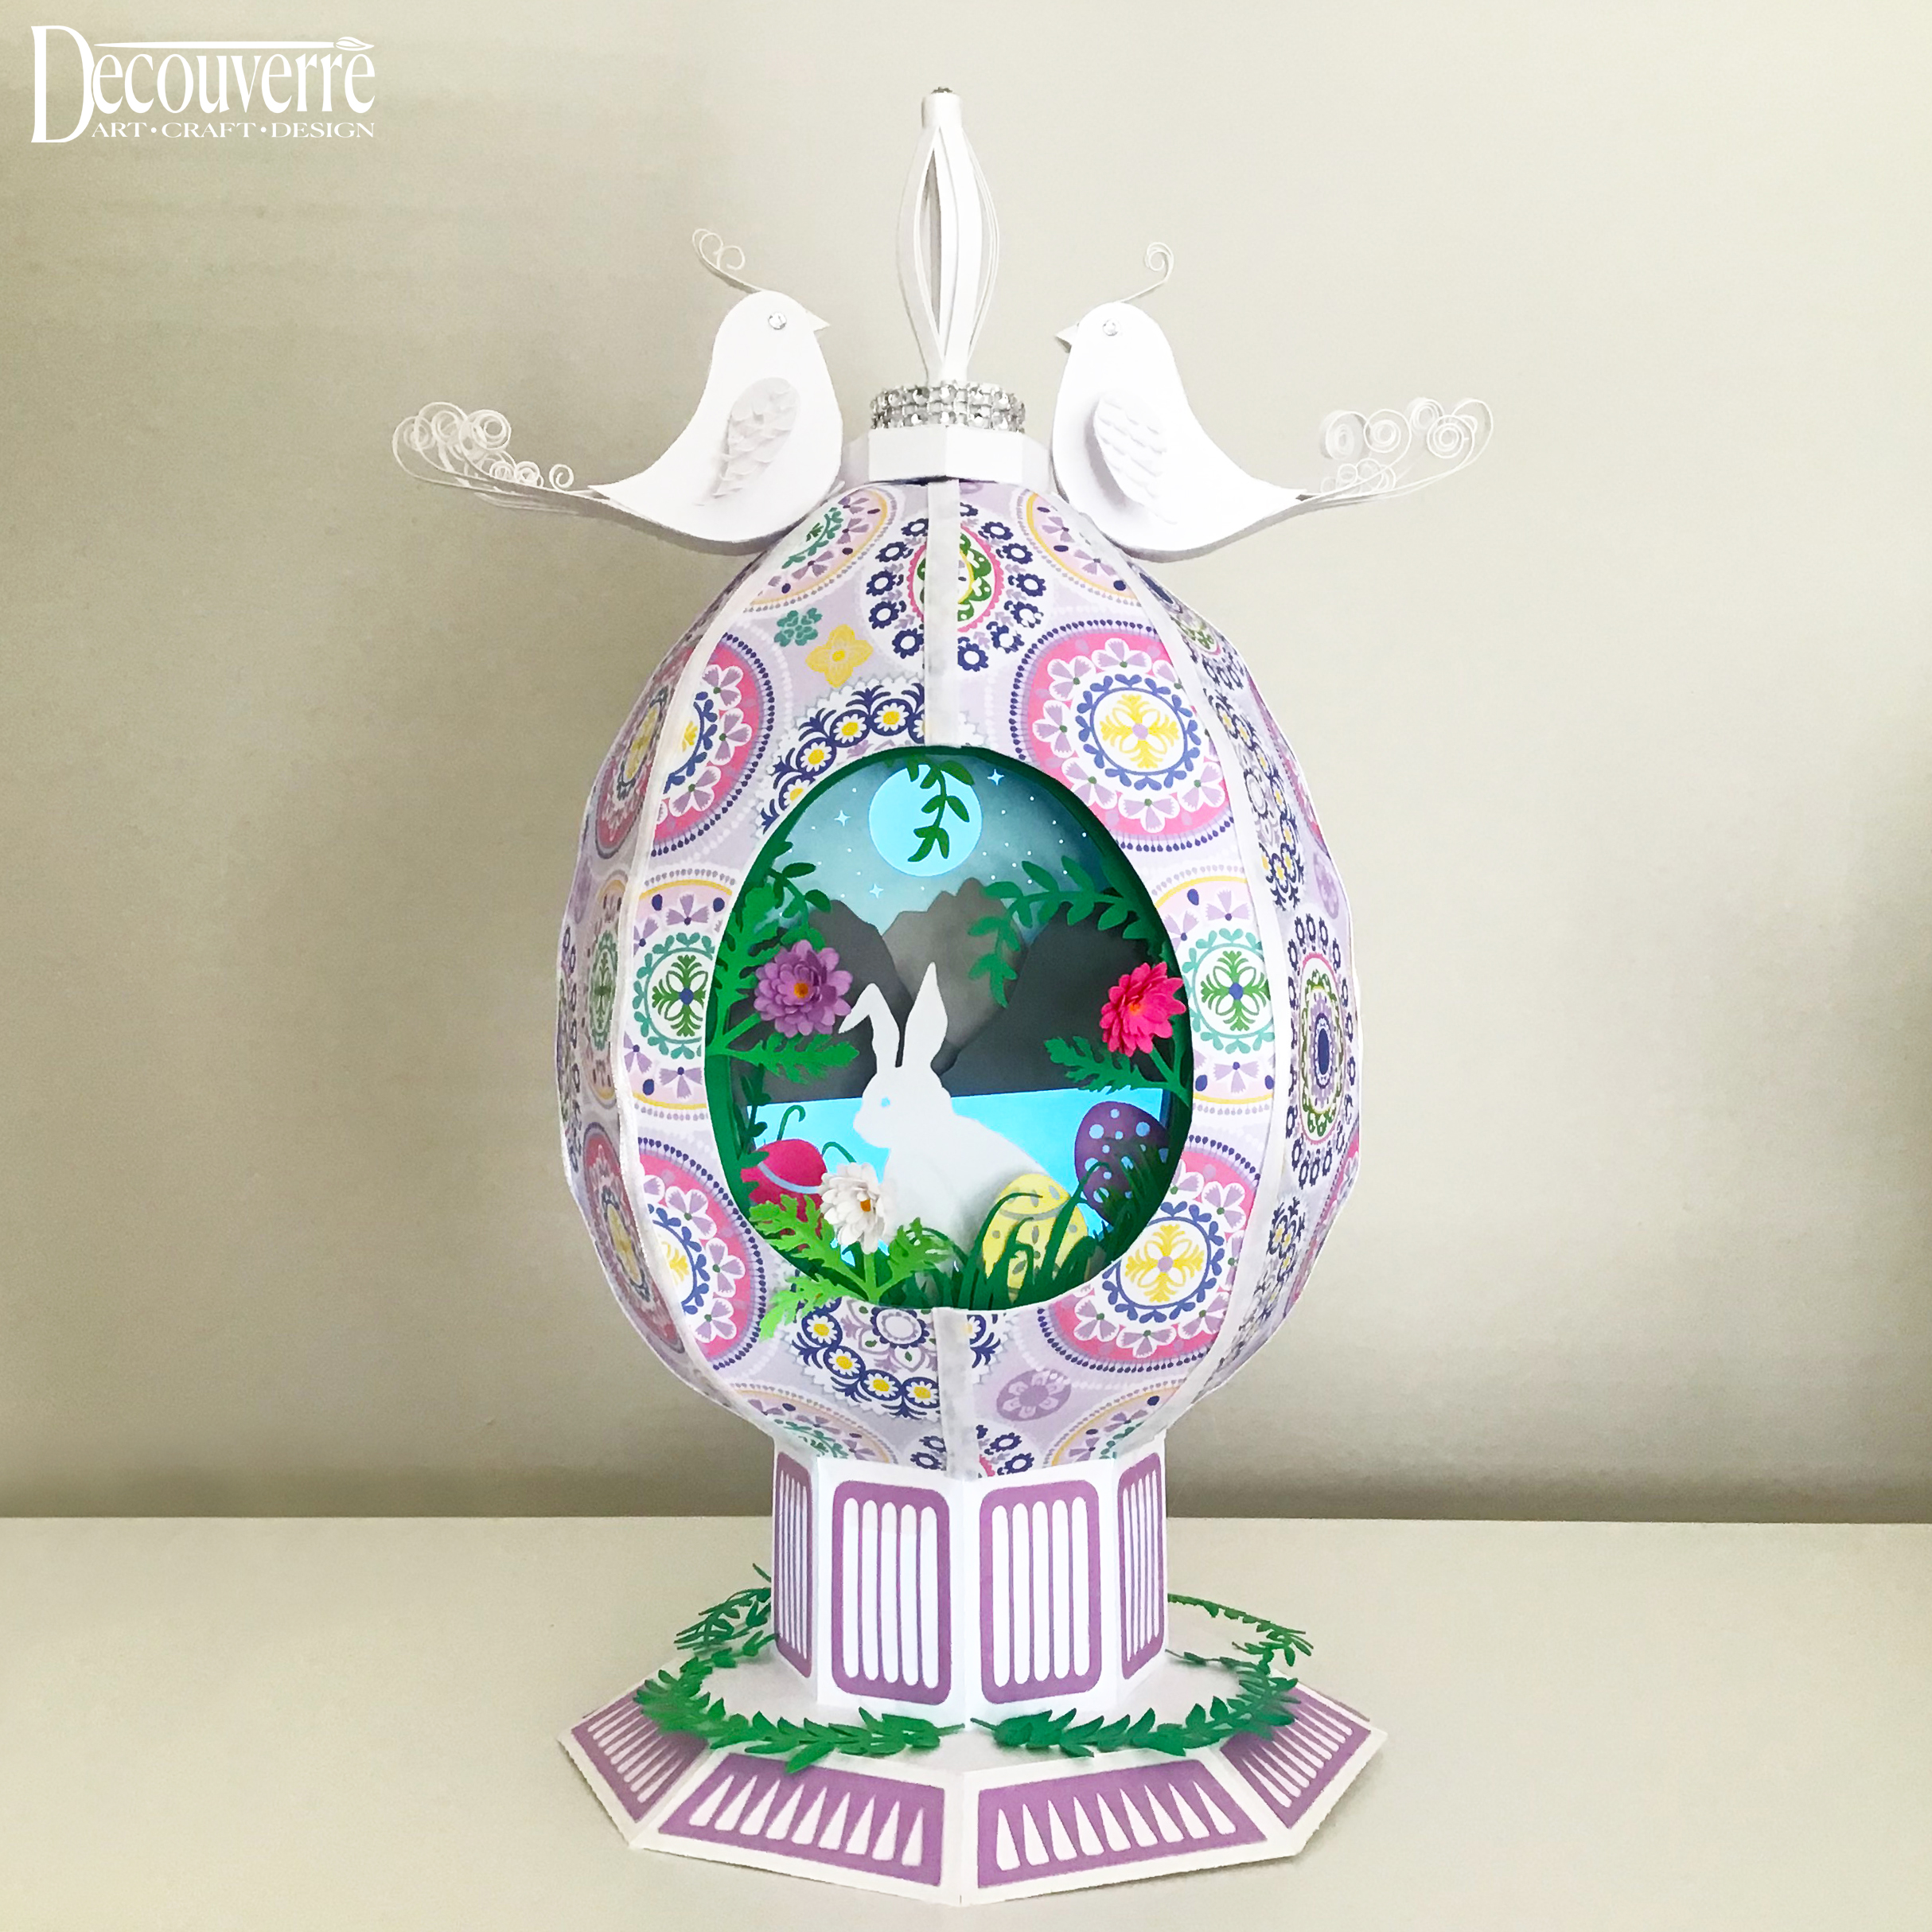
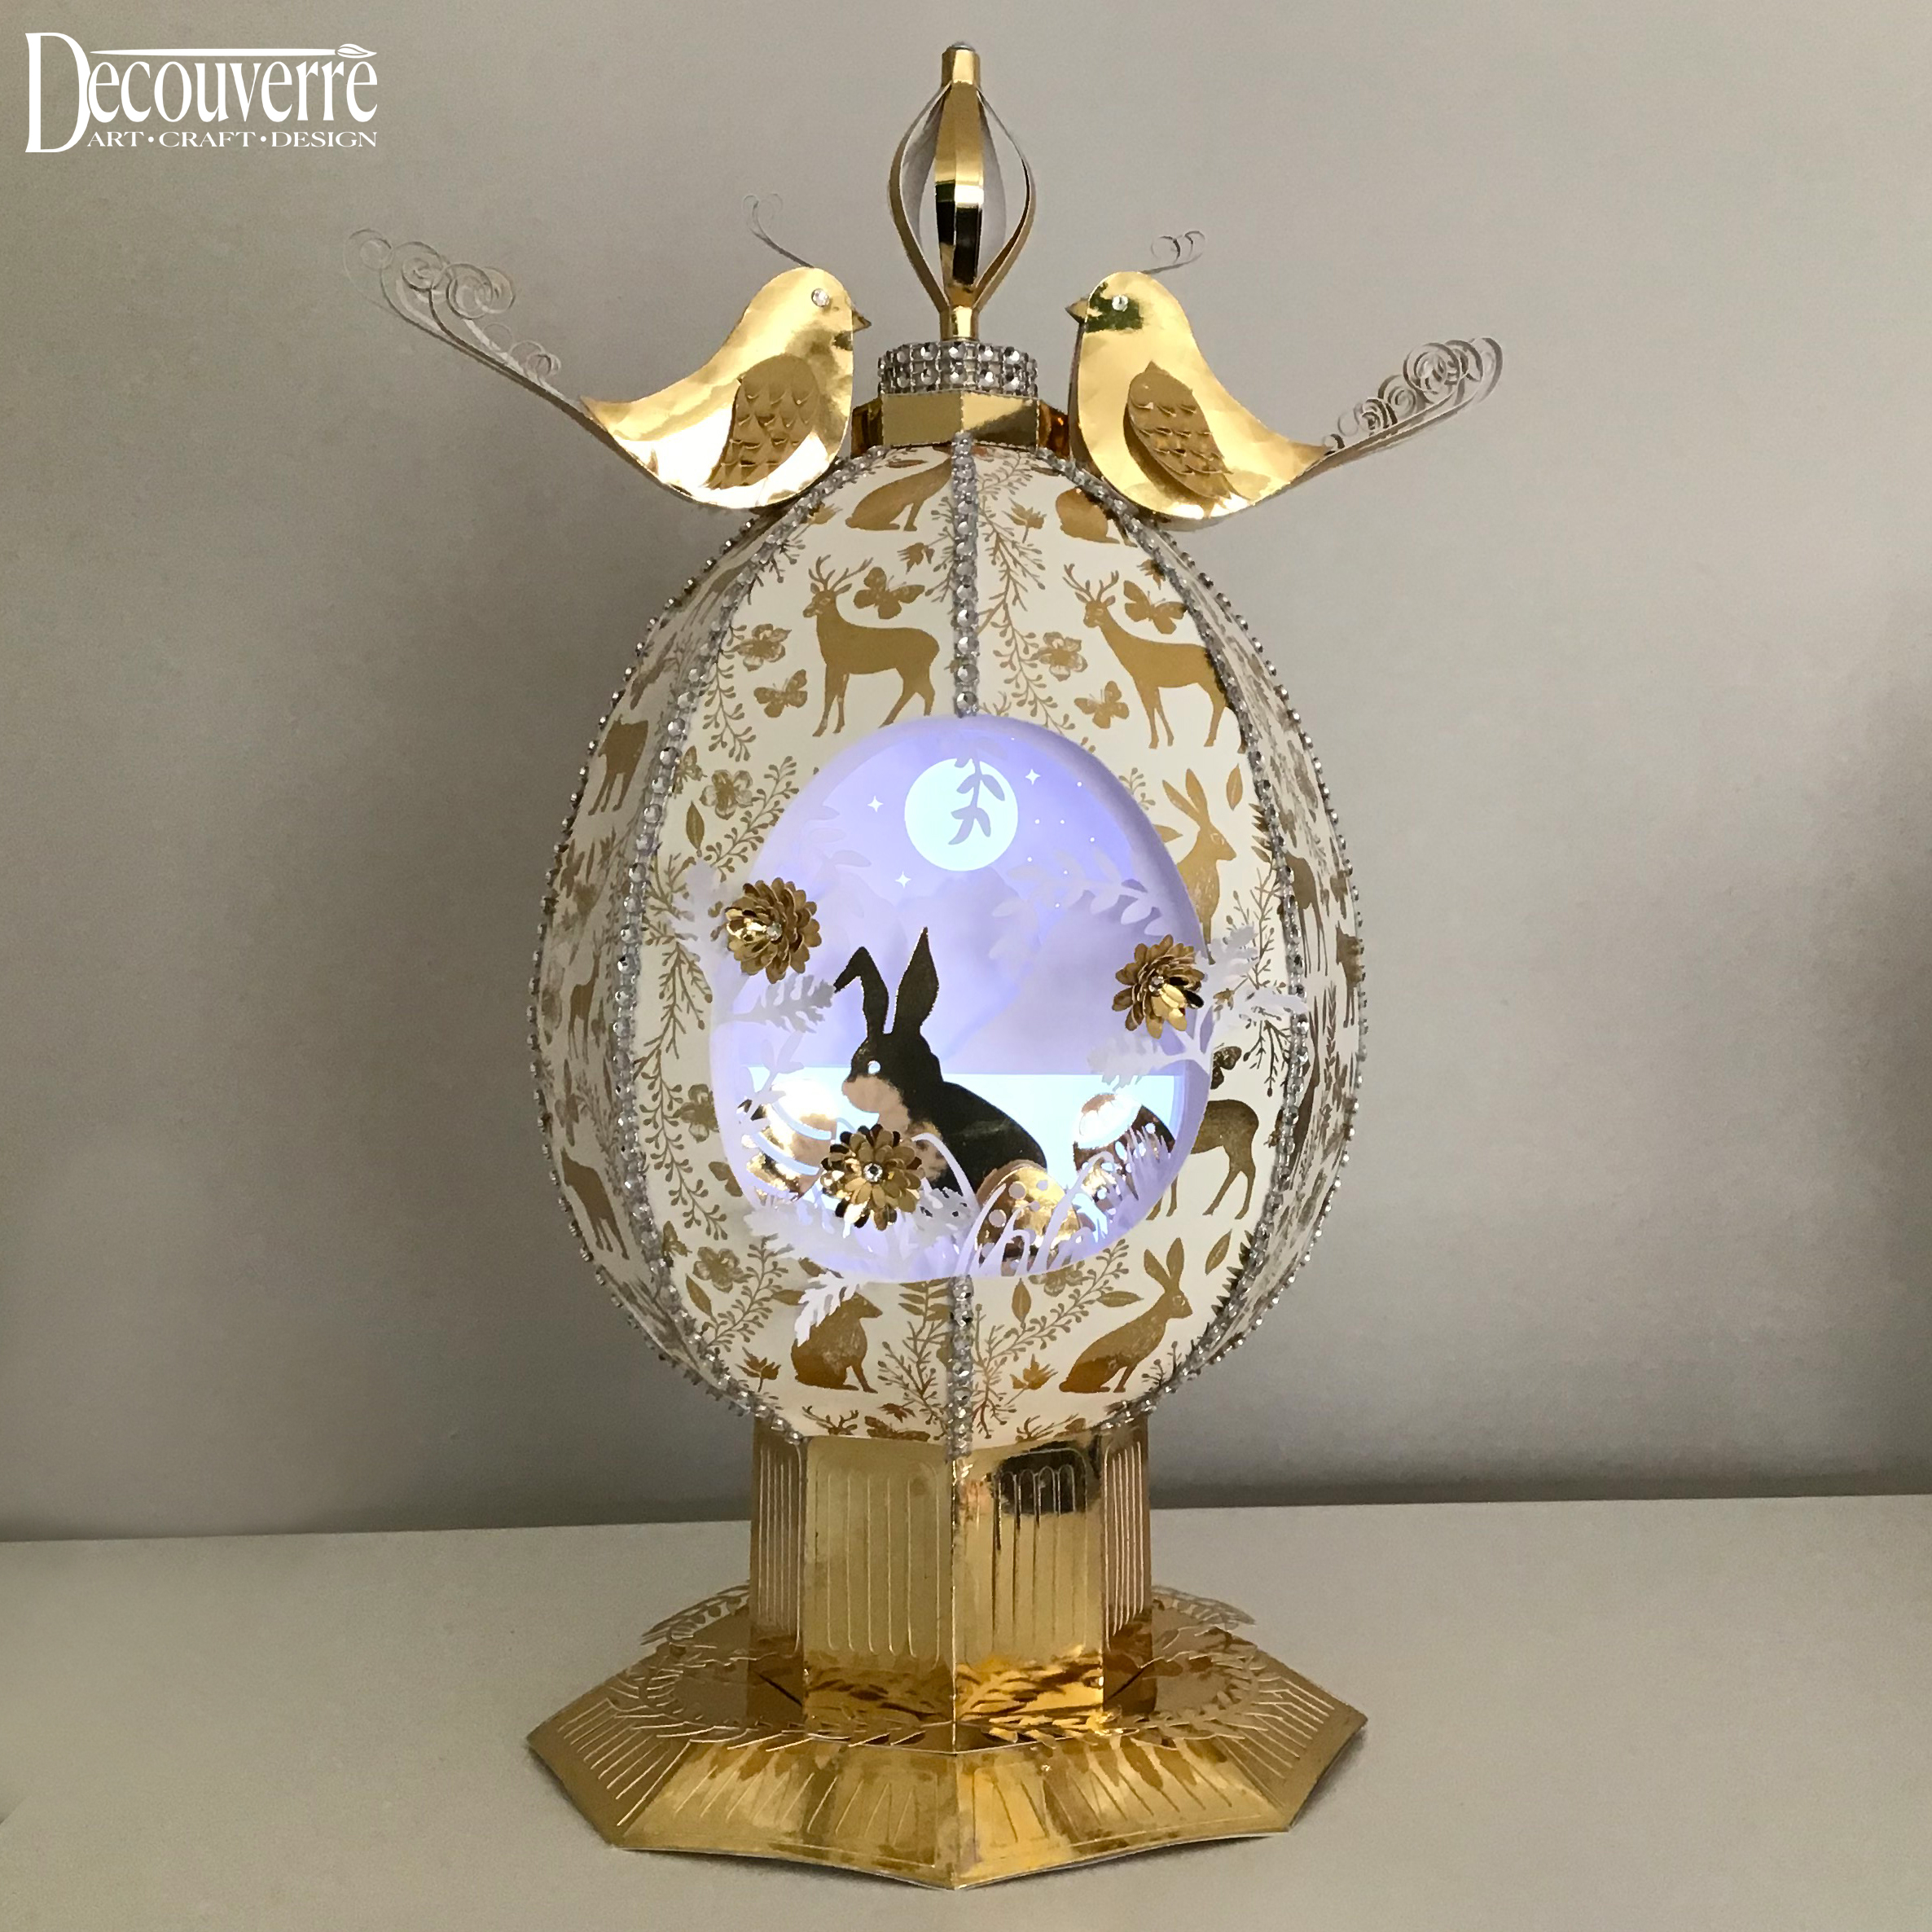
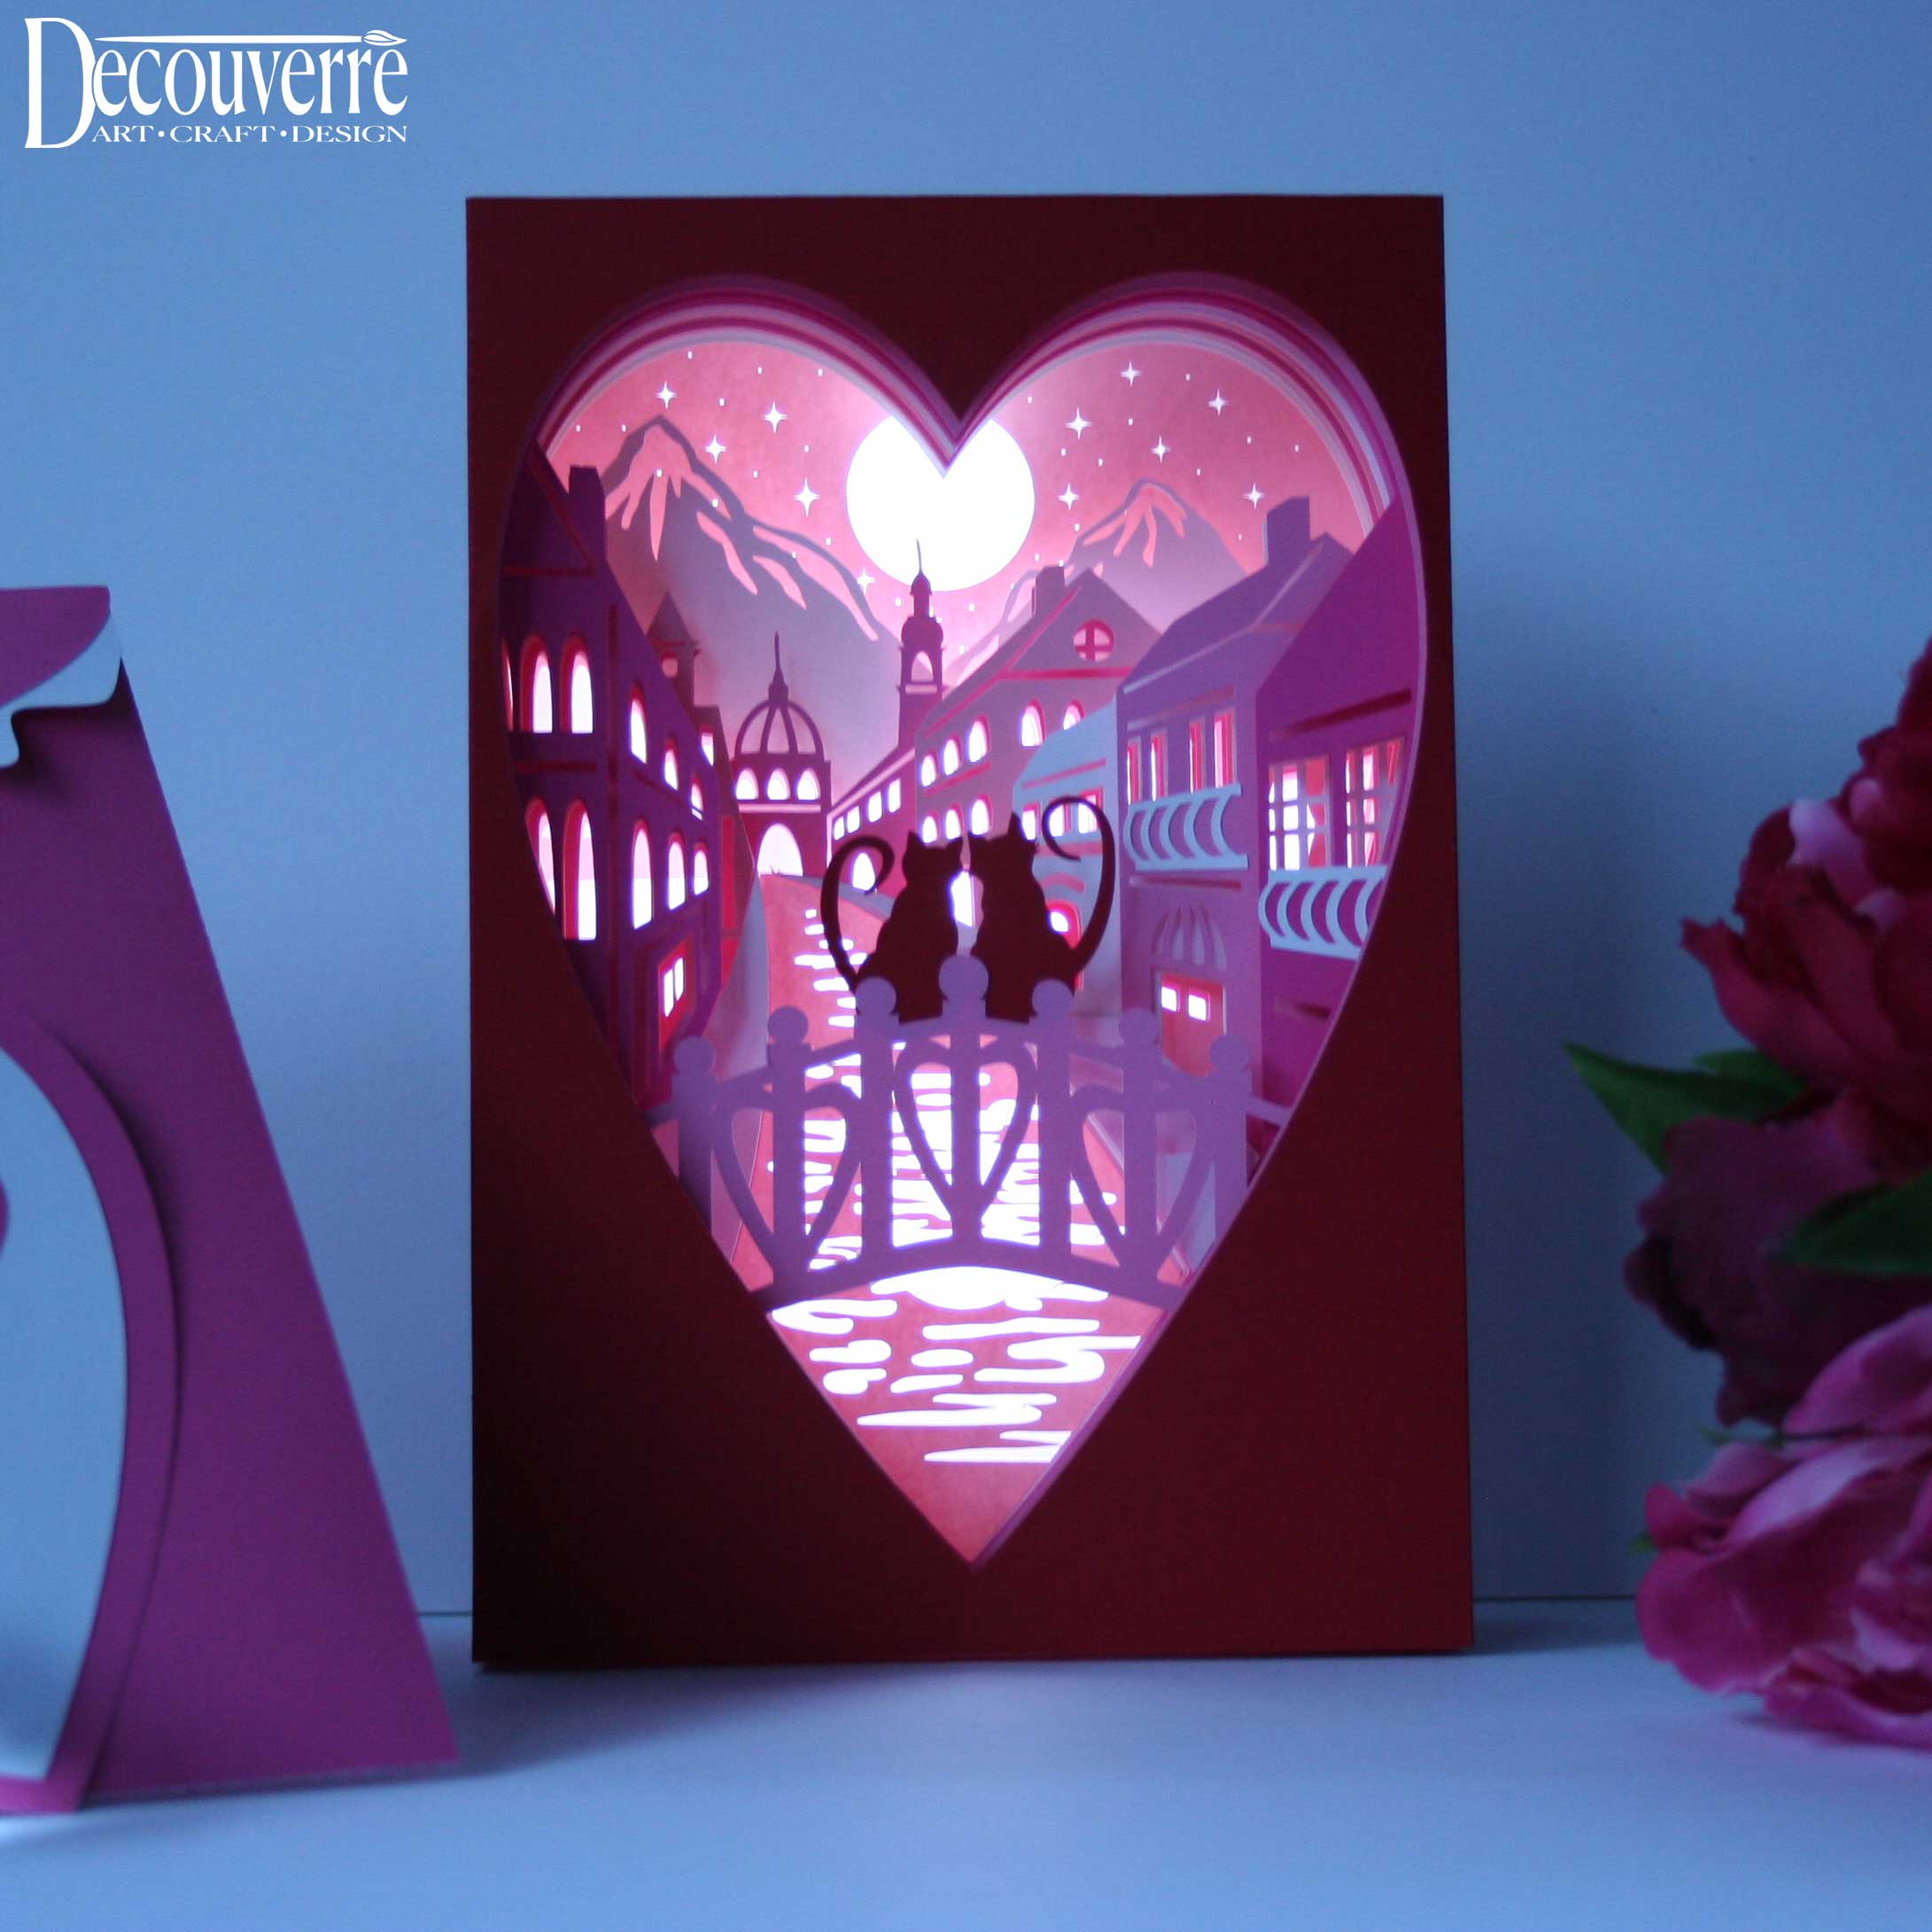
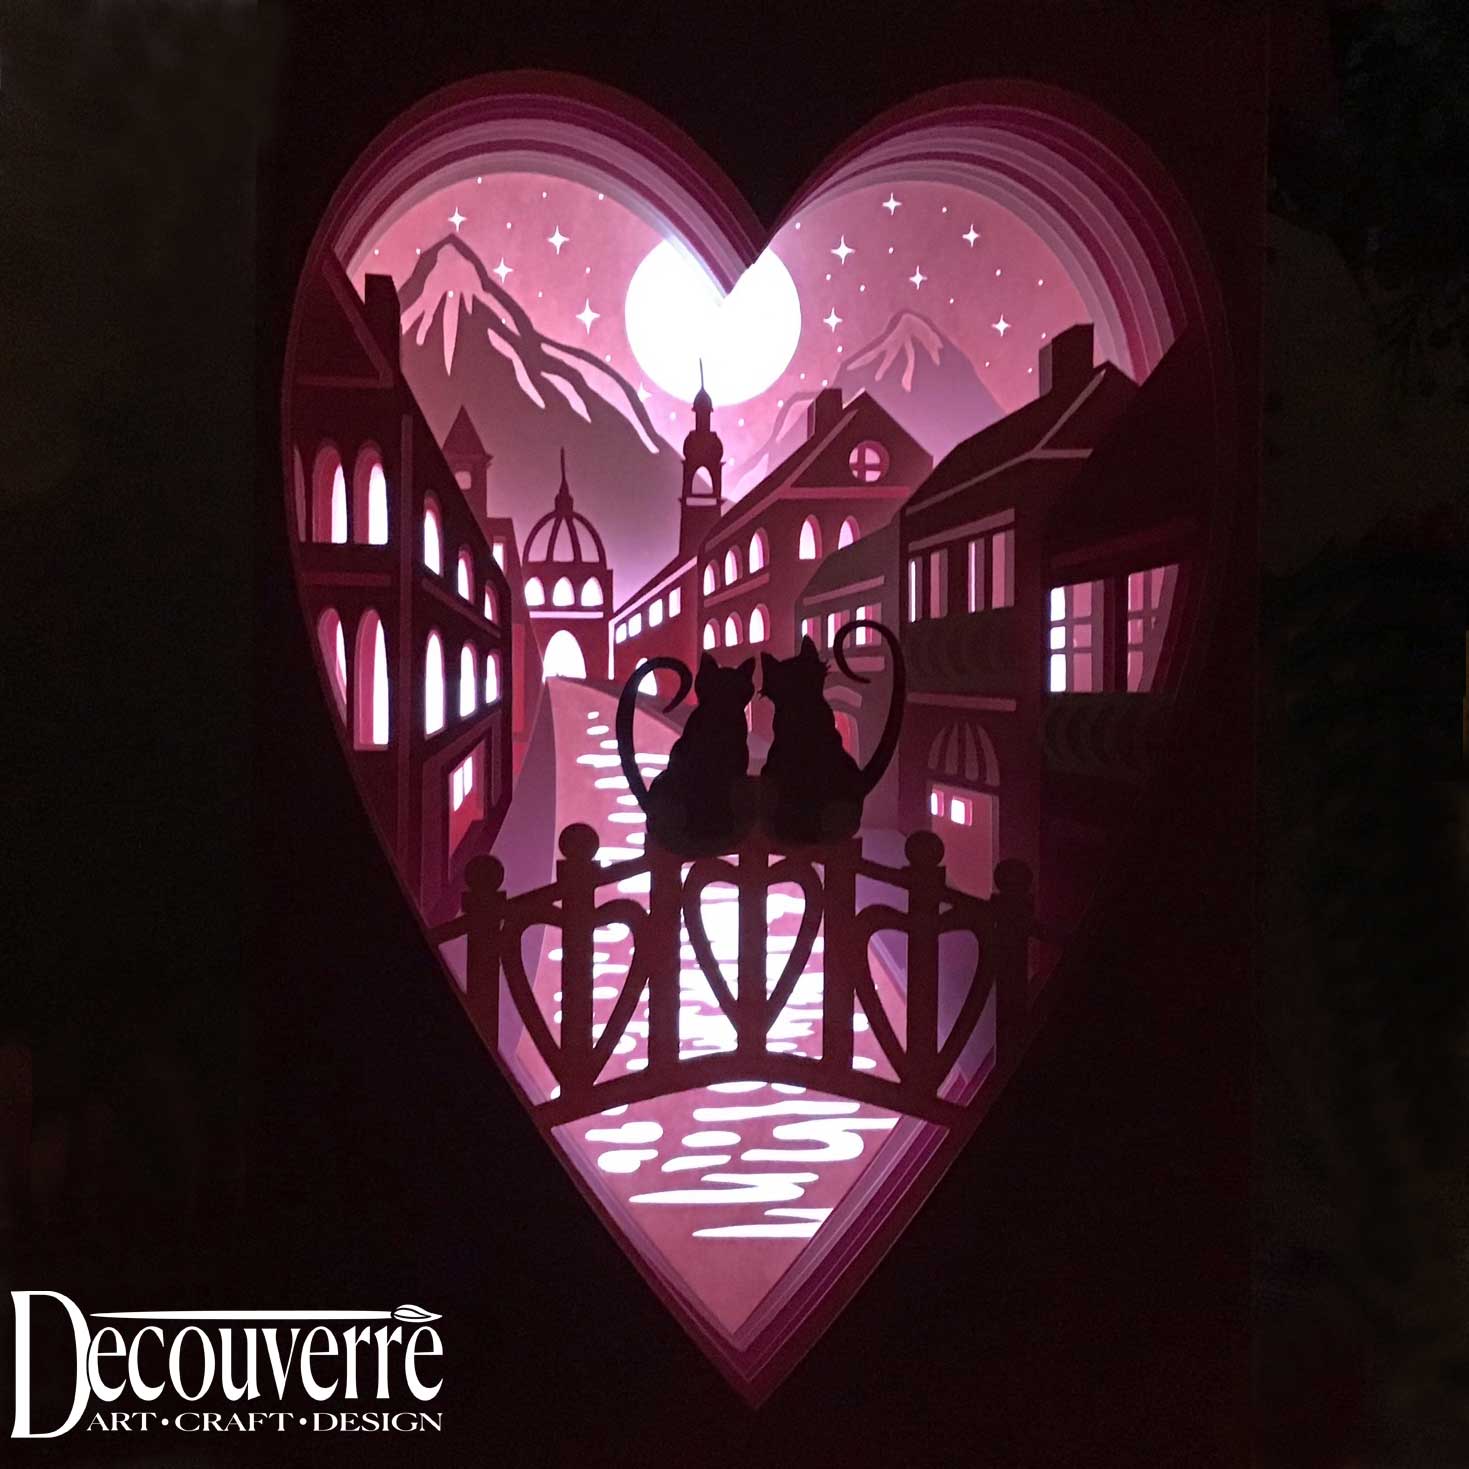
Posted on

New Valentine’s Day Shadow Box Card 3D SVG File

Valentine's Day Shadow Box Card
Valentine’s Day Shadow Box Card

Valentine's Shadow Box Card
Valentine’s Shadow Box Card

Valentine's Day Shadow Box Card
Valentine’s Day Shadow Box Card Night

Hello Everyone!

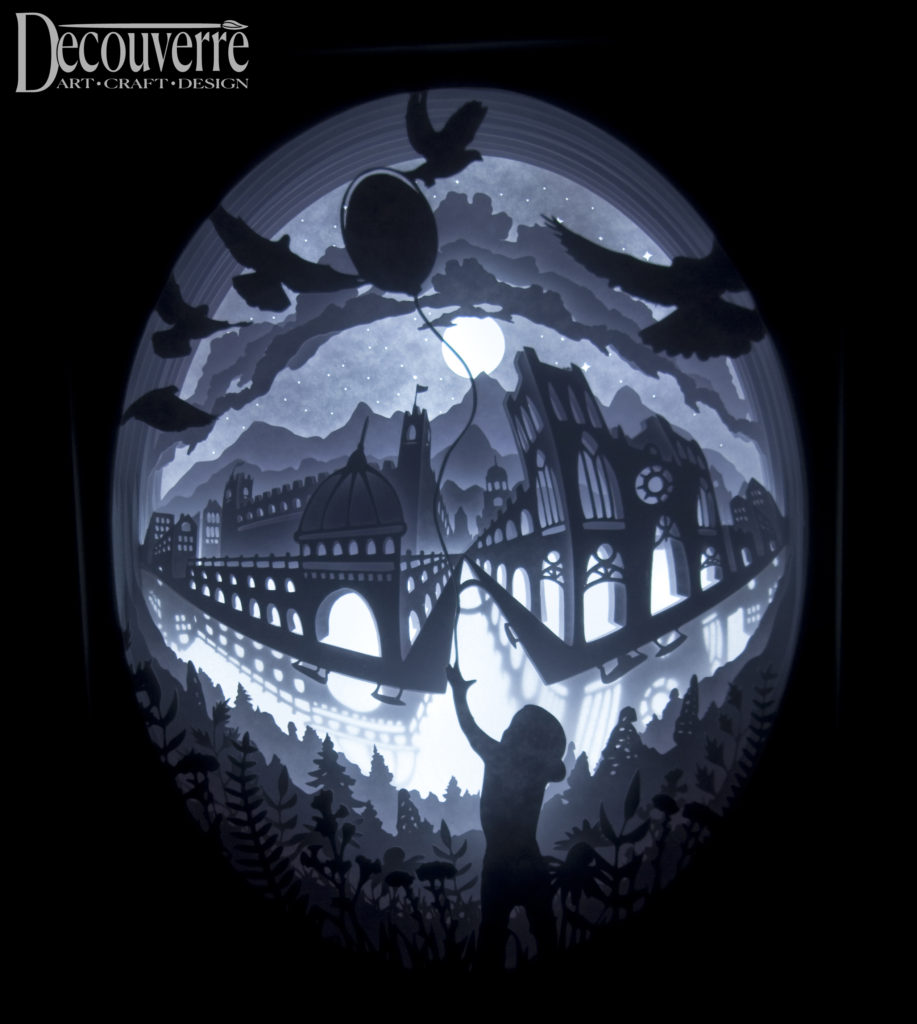
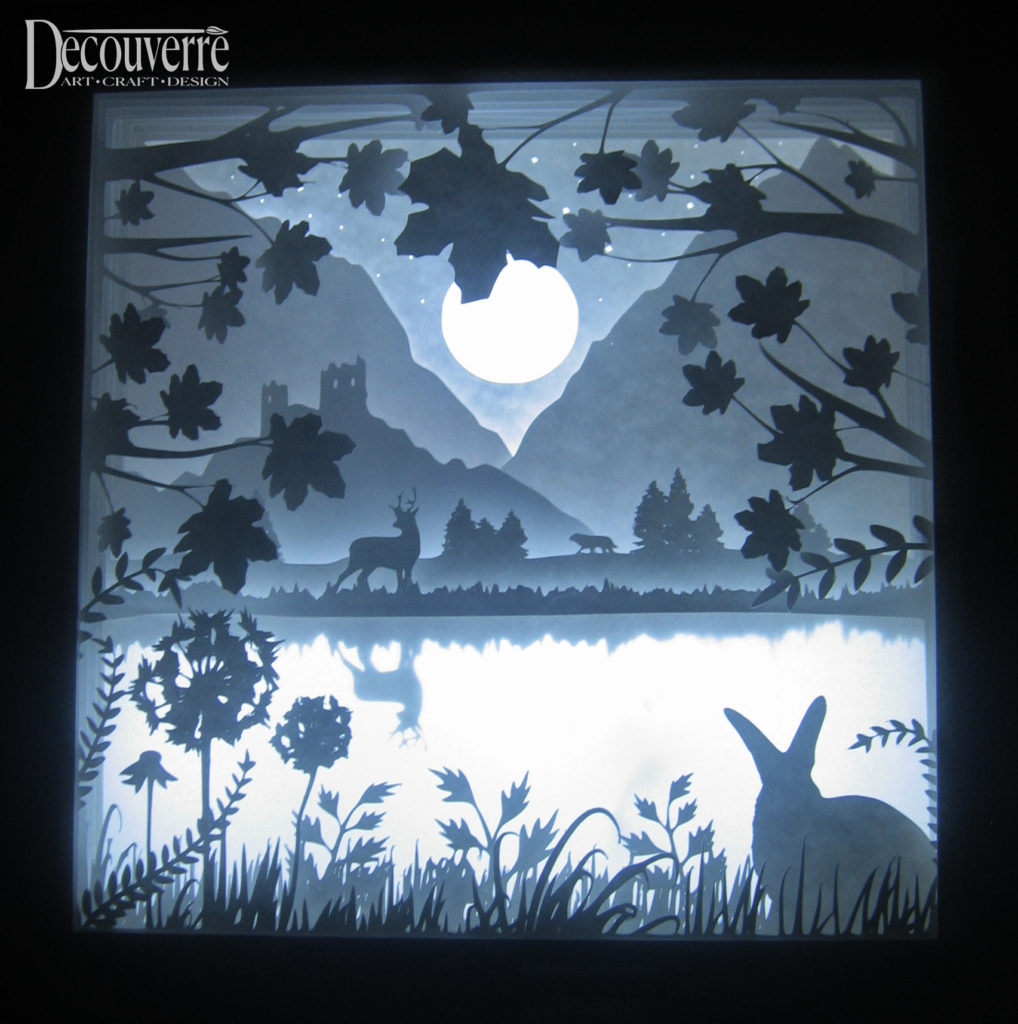
I finally completed this delightful Valentine’s Day Shadow Box Card project (The 3D SVG file is available  here) .  It really is just as pretty during the day as it is at night! I think it would make a gorgeous wedding card too. You could make it all in white with silver or gold accents. Perhaps some rhinestone embellishments too. Another monochromatic theme would work beautifully here too. There are so many possibilities to customize this card!

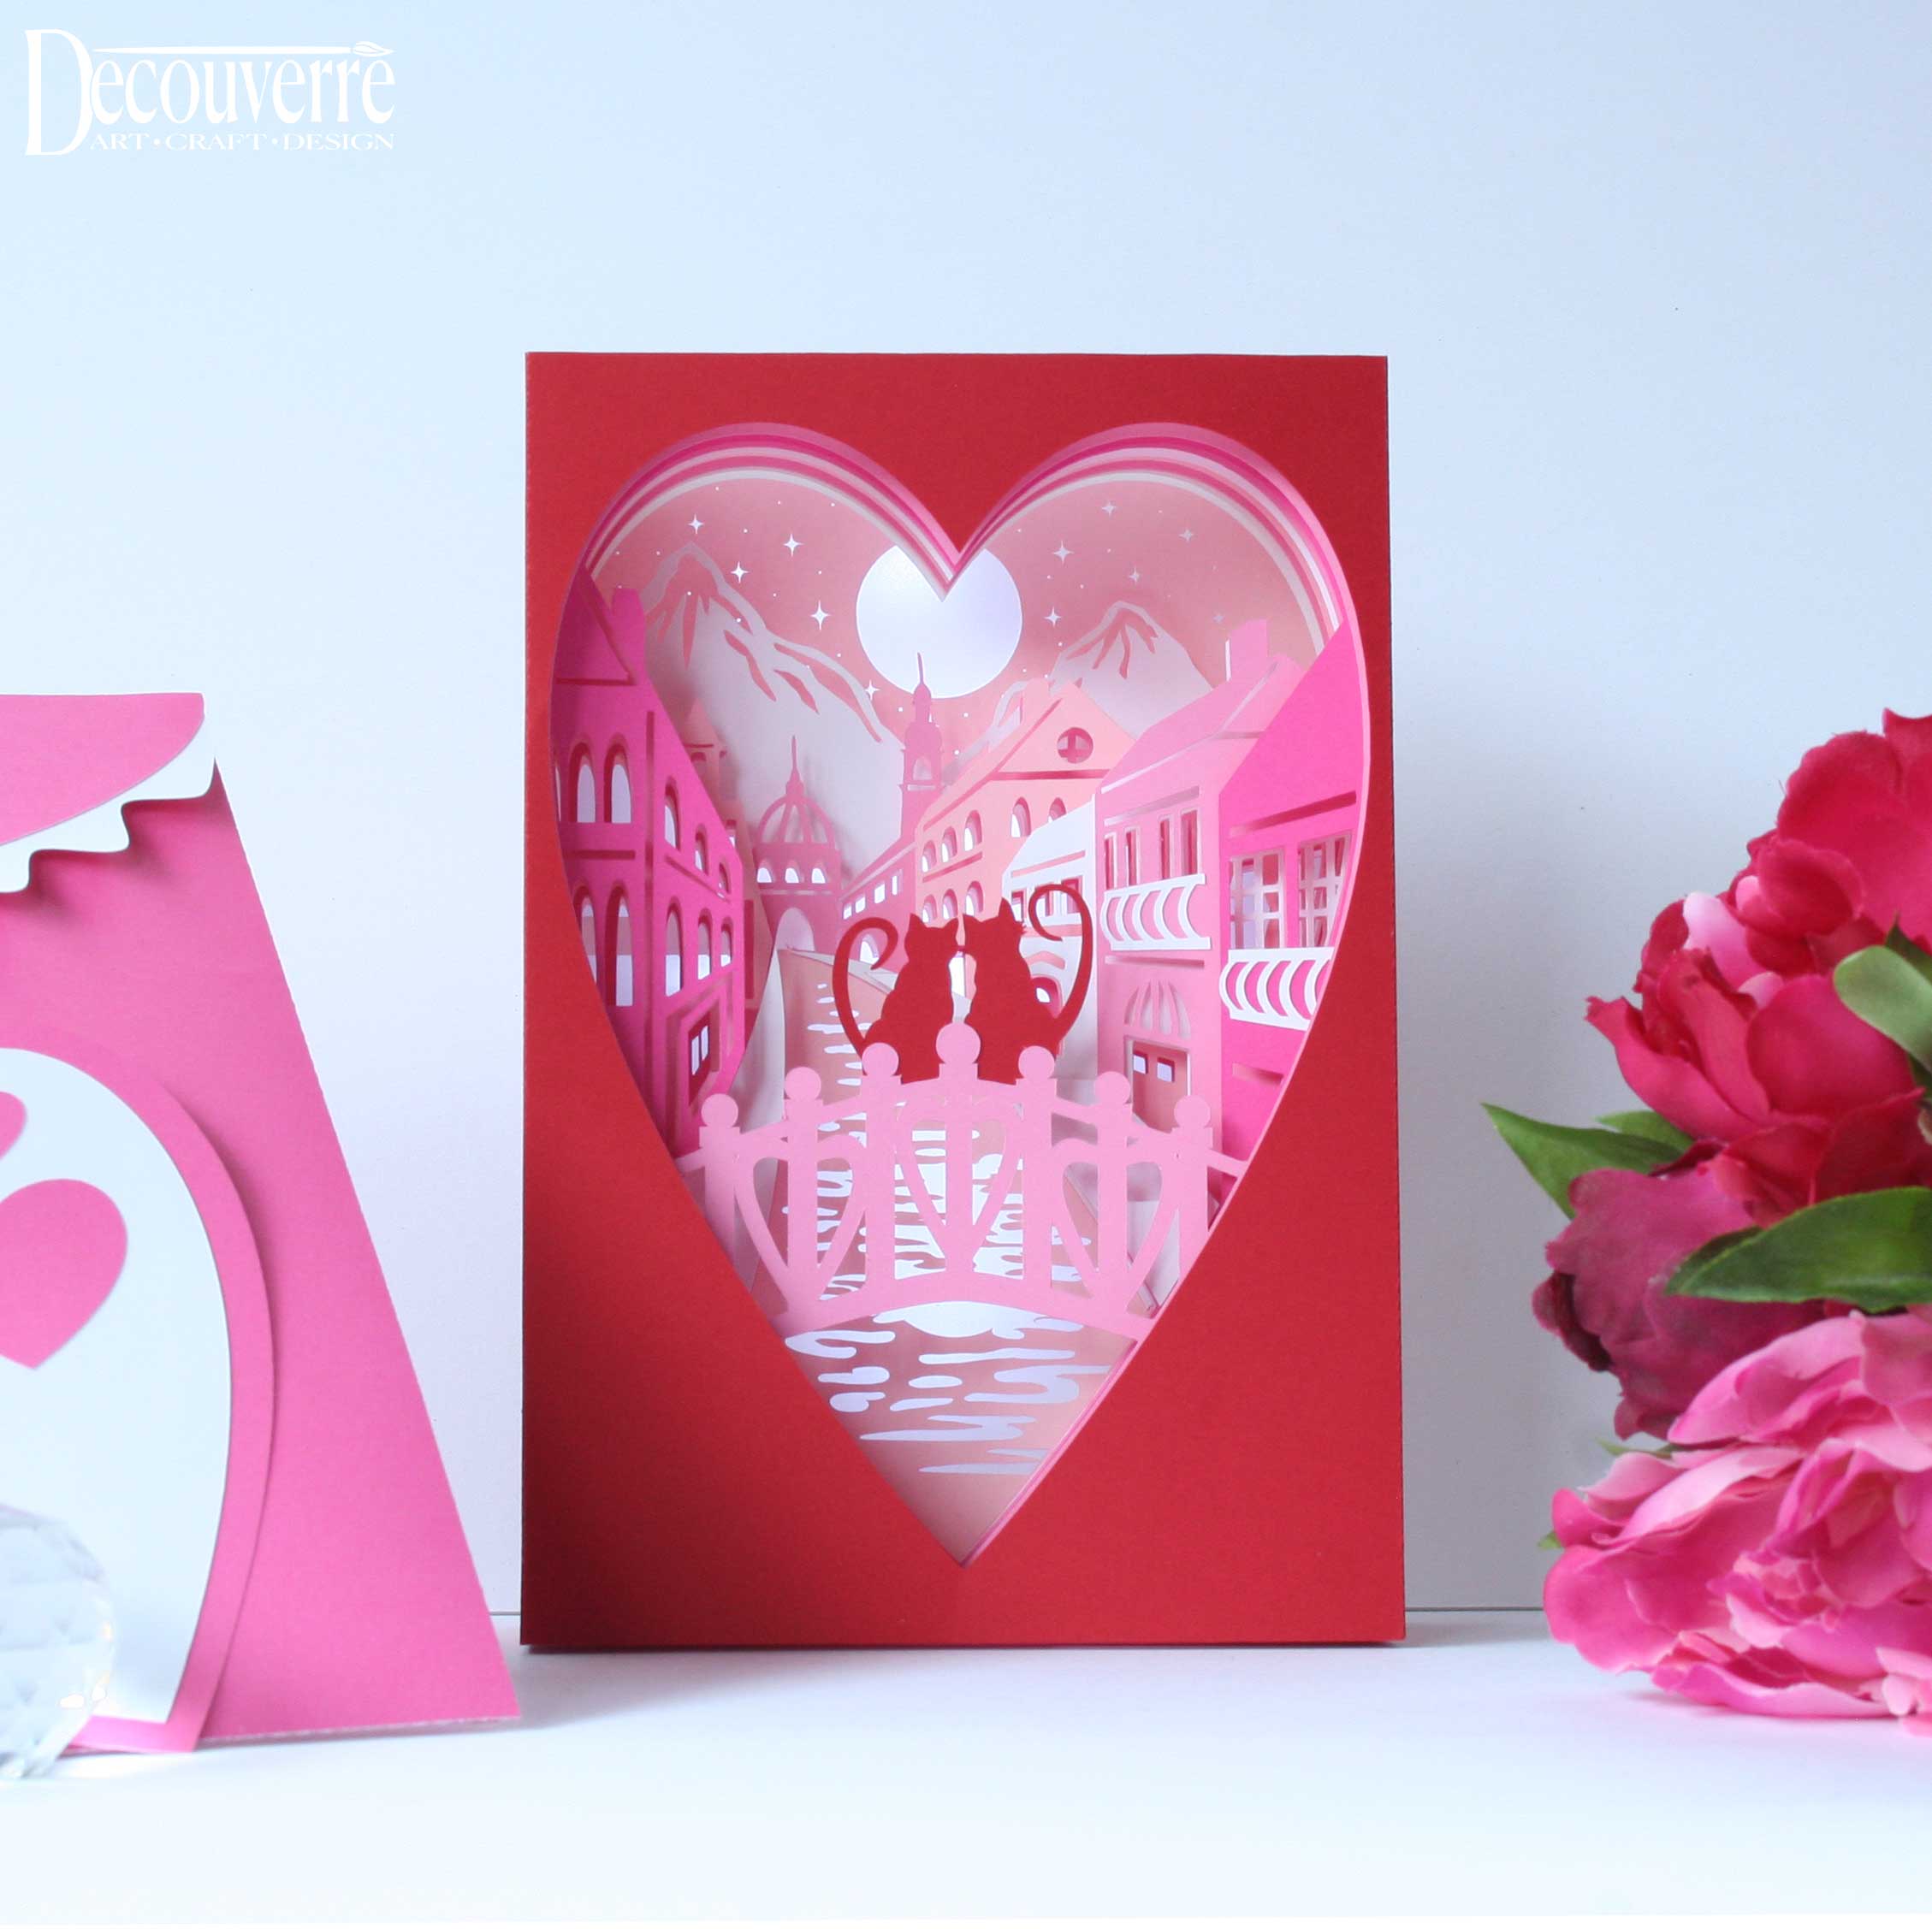
I have also included a pretty envelope file and valentine to write a sentiment. You can mail the card flat unlit. The recipient will be able to place it next to a bright lamp or votive for a warm glow. Alternatively, you can ship it in a box illuminated with LEDs. In the video,  I outline how to create both versions. 

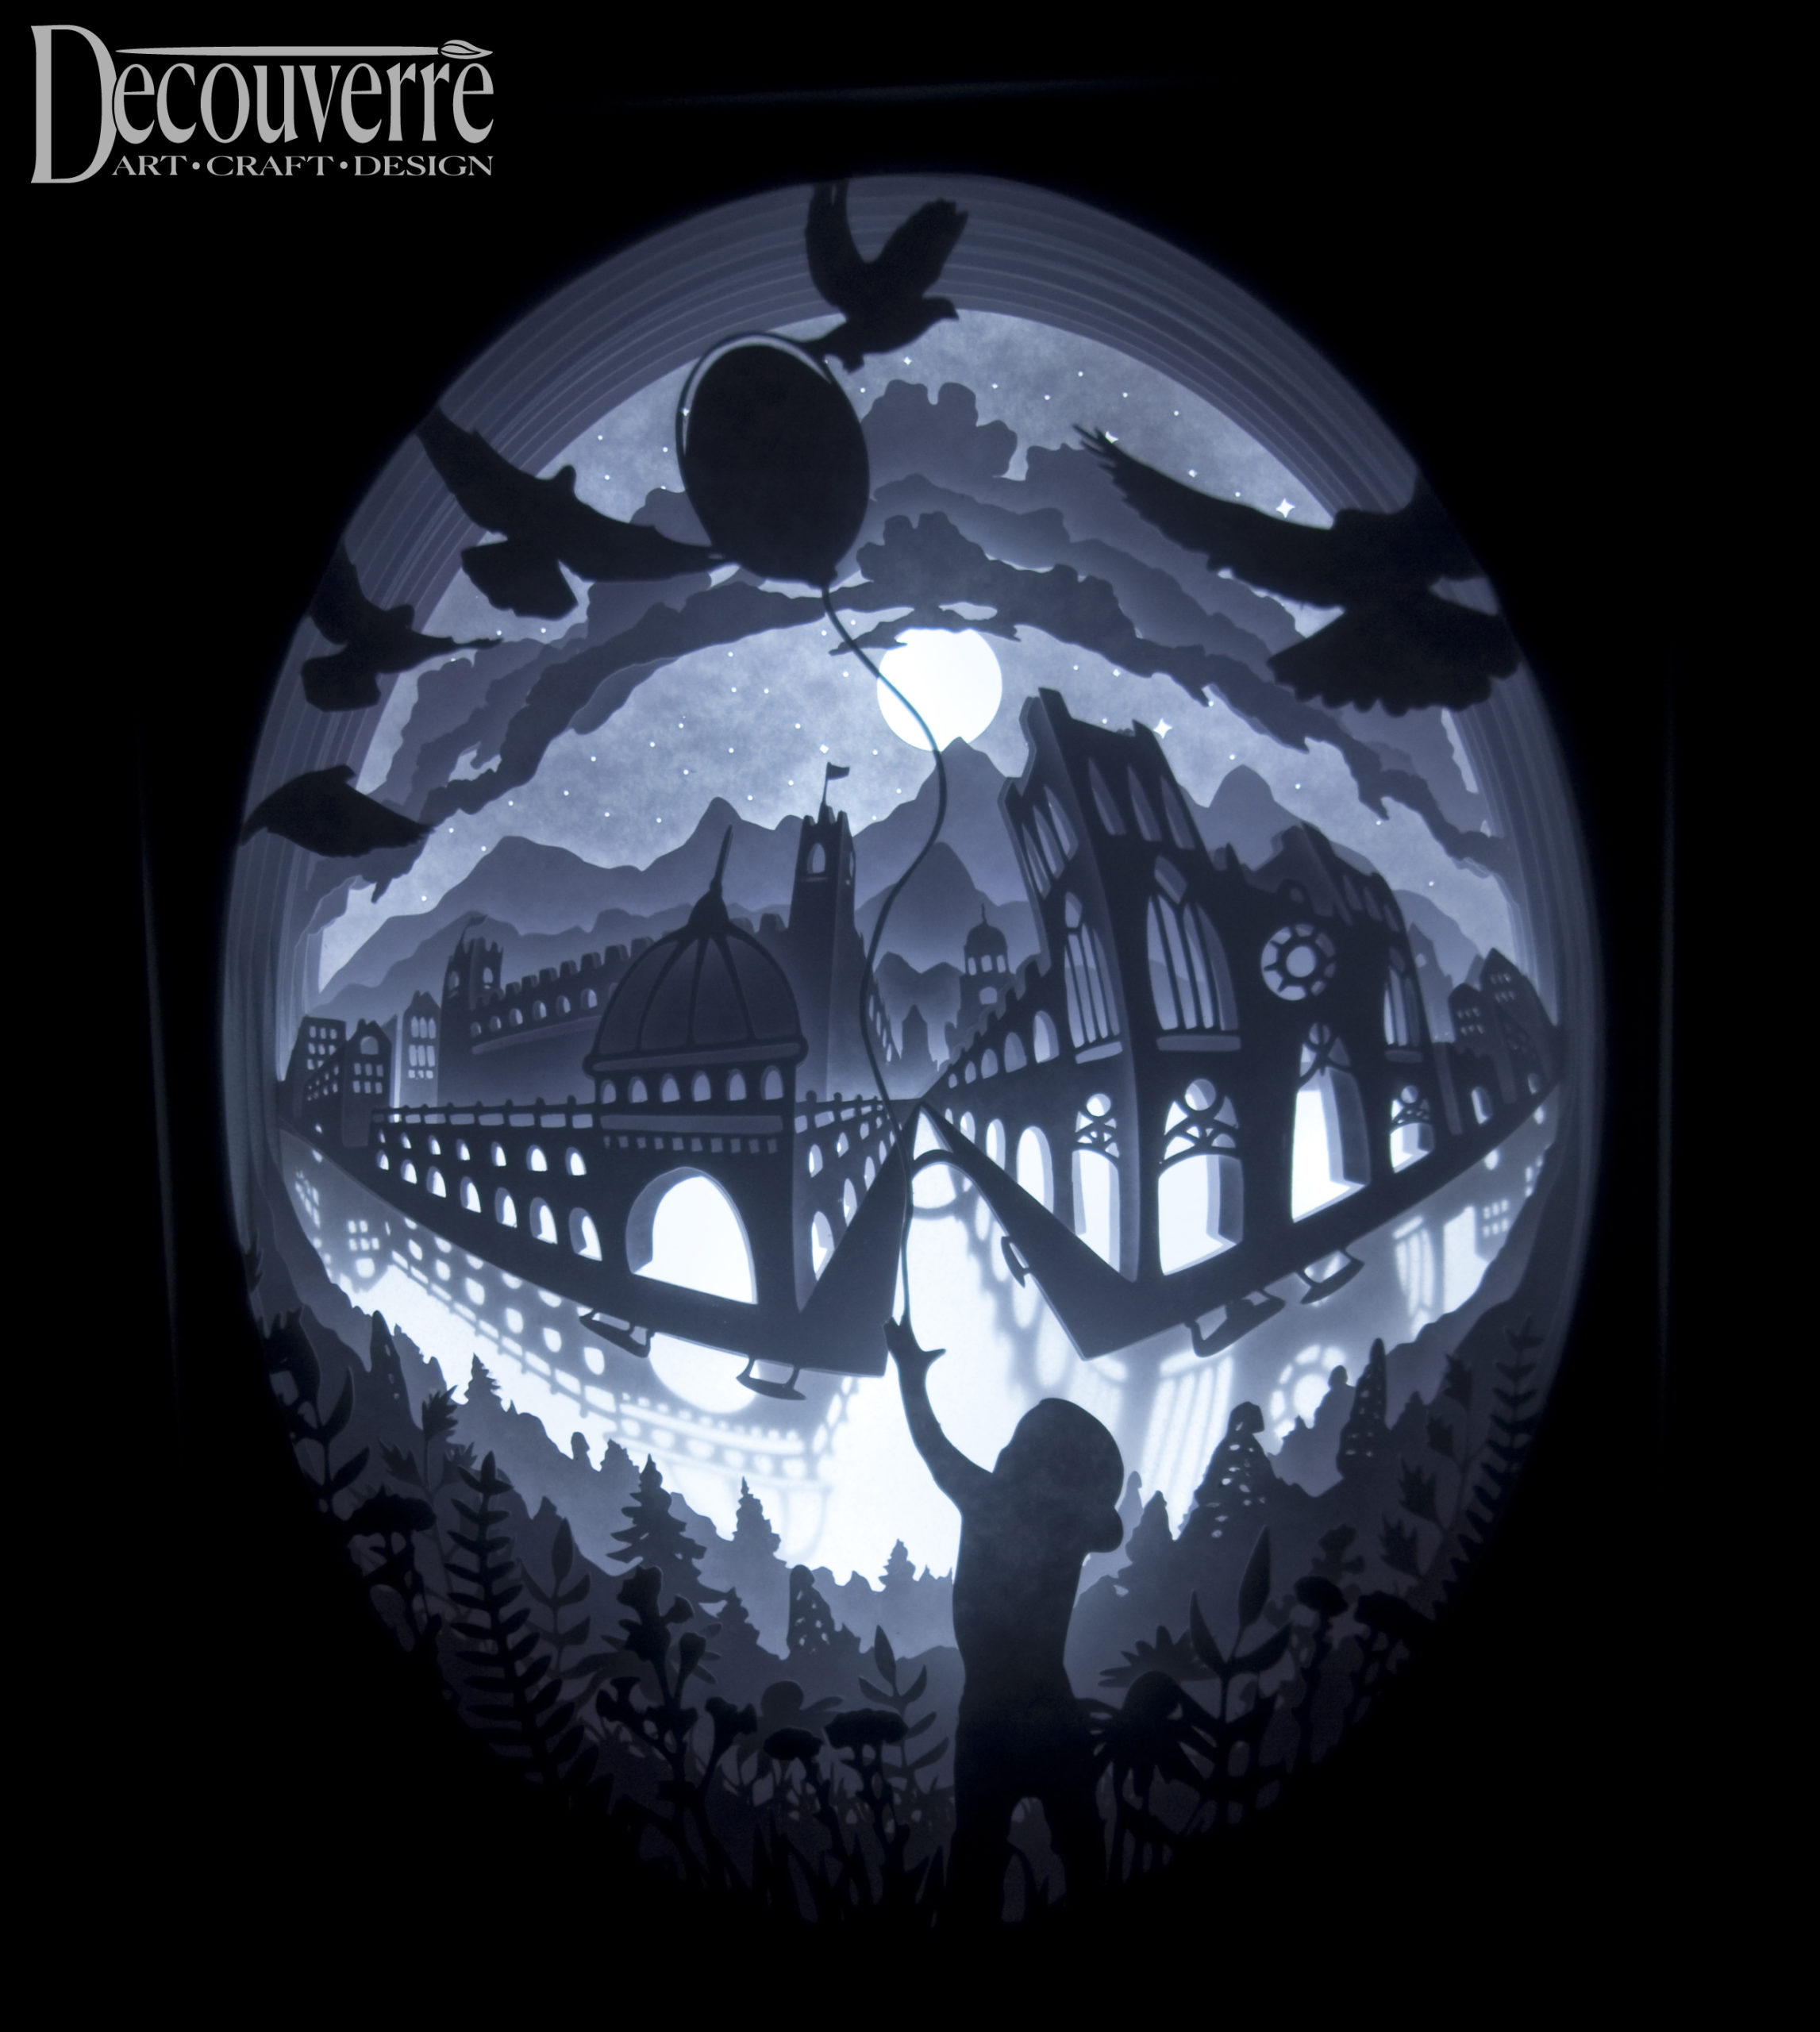
This SVG file can easily be enlarged and inserted in to a shadow box frame if you like. I have a few videos on how to create shadow box lights. Please see my assembly videos under the product listings to see how they all come together. 

I hope you like it!  Happy Crafting!

Posted on Leave a comment

The Paper Peony Topiary Lantern-My newest 3D SVG File

Peony Topiary Lantern

This has been a labour of love! I am really pleased with how this topiary lantern all turned out and I hope you love it too! . It all started with a sketch for the floral design cut out which I vectorized in Illustrator. After completing the Floral Lamp (which also took a long while),  I  began working on the topiary lantern in Blender 3D. Many prototypes, several cuts, and piles of spent card stock later,  I finally had a design I was happy with.

Designing the florals and foliage was a lot of fun. I really enjoyed choosing the card stock flower colours, shaping, inking  and arranging the Peonies, foliage and Peony buds. It was so very satisfying to see the final project completed and illuminated! It really sparkles at night!

The Peony Topiary Lantern project can also be used as a vase or receptacle for candy or potpourri (just omit the topiary box insert). A quick project to make for a party or as a hostess gift!

It was all designed as a part of my Spring Wedding Bundle which of course includes the matching Floral Lamp.

The project would be absolutely beautiful to create for your wedding reception tables or a special event. It would make a fabulous Mother’s Day or Valentine’s Day gift too!
I can’t wait to see all of your customized versions of this project file! Please send me your completed project photos to post in the upcoming web gallery. Thank You! Happy Crafting!

Posted on Leave a comment

How to Cut Intricate SVG Files On Your Silhouette Cameo or Cricut Machine

Here I have compiled a few tips on how to cut intricate SVG files cleanly and easily.

Cutting Tips:

  1. Use a newer cutting blade if possible for intricate pieces.
  2. Cut the intricate pieces first to ensure blade is at its sharpest.
  3. Always check to see if there is any residue left on your mat, on the blade or inside the blade housing.
  4. Use a clean cutting mat that is less sticky or medium sticky for intricate design pieces. Can blot a newer mat with a clean t-shirt or tea towel until desired stickiness is achieved. The mat should be sticky enough to hold paper in place during intricate cuts but not too sticky that delicate pieces rip during removal. 
  5. Use a weeding tool to remove the open spaces and then use a spatula to carefully remove your cuts from the mat.
  6. To avoid curling on some pieces, turn the mat over and curl the mat away from the paper.
  7. Adjust your machine’s cut settings.  The standard card stock cut settings may not apply for detailed cuts. As well, your blade may have dulled over time and you will need to change the settings to accommodate.
  8. Choose a slow speed setting (a 1 or a 2)
  9. Use the overcut feature on your machine (.1 mm). The machine will cut very slightly beyond the file cut line at the corners. The blade will then lift at the corner, turn and then set back down. This will make a much cleaner cut but will take a little longer to complete. 
  10. Adjust the force/thickness setting on your machine up or down:Go up if not cutting through. Go down if cutting but still “dragging” or creating messy cuts.
  11. Go up a blade setting if not cutting through cardstock at a high force/thickness setting-Go up a blade setting and then reduce the force/thickness settings (to avoid dragging).
  12. Can try a second pass-the machine will cut the object twice to achieve a cleaner cut and get rid of the “fuzzies”.

Hope these tips help you get the perfect cut every time! Happy Crafting!

Posted on Leave a comment

How To Re-stick Your Silhouette Cameo or Cricut Cutting Mat

There comes a time when your cutting mat loses its tackiness. No doubt you will notice poor cuts, misalignment, the catching or skipping of the blade and sometimes odd noises emanating from your cutting machine. Instead of running to my nearest craft store to buy yet another pricey mat, I just re-sticky my old mat. Below are my favourite methods:

1. If a newer mat and still has quite a bit of glue residue left to work with, try running your mat under warm water and gently rub off any bits of paper or fluff. The key is not to rub too vigorously as you may unglue your mat. Once most of the residue is gone, just hang to dry. It should renew your mats stickiness if enough glue left on mat. If still not tacky enough, add a little bit of dishwashing liquid, rub gently, rinse and hang to dry. If still not tacky move to step 2.

2. If you tried the above and mat is still not sticky enough, it is time to thoroughly clean your mat and re-glue. Run your mat under warm water and apply dishwashing liquid. Use an old credit card or scraper to remove the most stubborn deposits. Rinse off and hang to dry.  Once dry, apply masking tape around the edges of your mat.  Make sure that only the mat grid is exposed (see pic).  Go outside as this is a messy and smelly process or spray inside a cardboard box. Using Krylon Easy Tack Repositional Adhesive, shake the can for 3 minutes. Position so that it is approximately 8 inches above mat surface. Begin spraying from side to side in a even continuous motion. Continue to the bottom. Then begin spraying up and down. This should suffice. You want a thin, even layer of adhesive. Let dry for 1 hour and then remove masking tape.  Do not be tempted to add more layers of adhesive until you attempt a cut, as too much glue can gum up your blade and can make it impossible to remove your cuts cleanly from the mat. Try a test cut on your machine. If too sticky,  just lightly dab your mat with a clean t-shirt or tea towel. If still not tacky enough, try applying 1 more thin layer of adhesive. 

Hopefully these tips work for you! Happy crafting!

Posted on Leave a comment

Paper Lantern 3D SVG File

Floral Paper Lantern 3D SVG

Finally completed this gorgeous floral paper lantern 3D SVG file. Really pleased with the result. It is so stunning as it cycles through a rainbow of LED colours. I think I may create another one using silver shimmer papers and rhinestone ribbon details. Imagine how beautiful it would be to create a bunch of these lanterns for your wedding reception or party decor. So many possibilities for customization to suit your theme. Add ribbons, trims, paper flowers, decorative papers, etc to make this paper lantern your own.  Could also use colour vellum if you are using plain white LED lighting options if you want a glow of colour. Thinking a wedding crafting party is definitely in order! Stay tuned as a matching floral topiary luminary is in the works!

Posted on Leave a comment

New Easter Egg Light 3D SVG File

It took a long while to design and create these fabulous Easter Egg Lights. In this case, I designed two distinct looks- a Springtime theme and a Faberge egg inspired theme. They are illuminated with a LED light puck that comes with a remote. You can change the colours at will. So much fun! These gorgeous lights can be customized in so many different ways. The landscape elements can be changed to suit your theme, season or holiday. They would be perfect as a nightlight in a child’s room to display year round. Add a snowman or Santa silhouette for Christmas or hearts and a couple silhouette for a wedding centrepiece. So many possibilities! The 3D SVG cutting files and accompanying assembly video tutorial makes crafting a breeze. Happy crafting! Looking forward to seeing your own creations!

Easter Egg Light

Posted on Leave a comment

3D SVG file Valentine’s Day Box Card Project

Just completed this fun Valentine’s Day Box Card project. So beautiful and was so much fun to create! I used burgundy, old rose, dark green and moss green Colorbox pigment dyes to add colour to the roses and leaf tips (optional). Creates depth and more realism. You could choose a completely different colour theme for your card. This box card would be gorgeous with a white rose bouquet or even an all white theme with rhinestone embellishments and metallic elements. The gift box could be decorated with flowers, ribbon and hearts as well. The elements in this SVG file could be incorporated into many other crafting projects.  So many possibilities!
Valentine's Day Box Card 3D SVG file

Posted on Leave a comment

Welcome to Decouverre! Your source for creative 3D SVG files!

Hello and welcome to Decouverre! Being an avid crafter and maker, I always have tons of crafting ideas flying around in my head. Since acquiring my own electronic cutting machine, the creative potential seems boundless and I have now devoted most of my time to the joys of paper crafting. I hope to share many of these projects, ideas and tips on this blog. Currently, I am working on several new designs and very shortly will be uploading the 3D SVG cutting files, video and PDF instructions for my whimsical Balloon Boy Shadow Box Light and Highlands Shadow Box Light (check out the images below). So much more to come including Wedding, Easter, Mother’s Day, Fall, Halloween and Christmas themes. I hope you enjoy my designs and come back often for more fun and creative 3D paper crafting projects!